Hike and Fly
Working principle
It’s quite common to hike the same trail multiple times, or even very frequently. Attaching the track for an identical hike to every flight would unnecessarily overload the logbook’s database. To avoid this, a hike file is created.
This hike file lists the routes along with their characteristics: elevation gain, base time, and any GPS track. During a flight that includes a hike, you can access the itinerary from the flight logbook by retrieving it from the hike file. It will be linked to the flight, and we will enter the climb time for the day.
Logbook
Input a hike
In the context menu, select the Hike option. A dialog box appears:
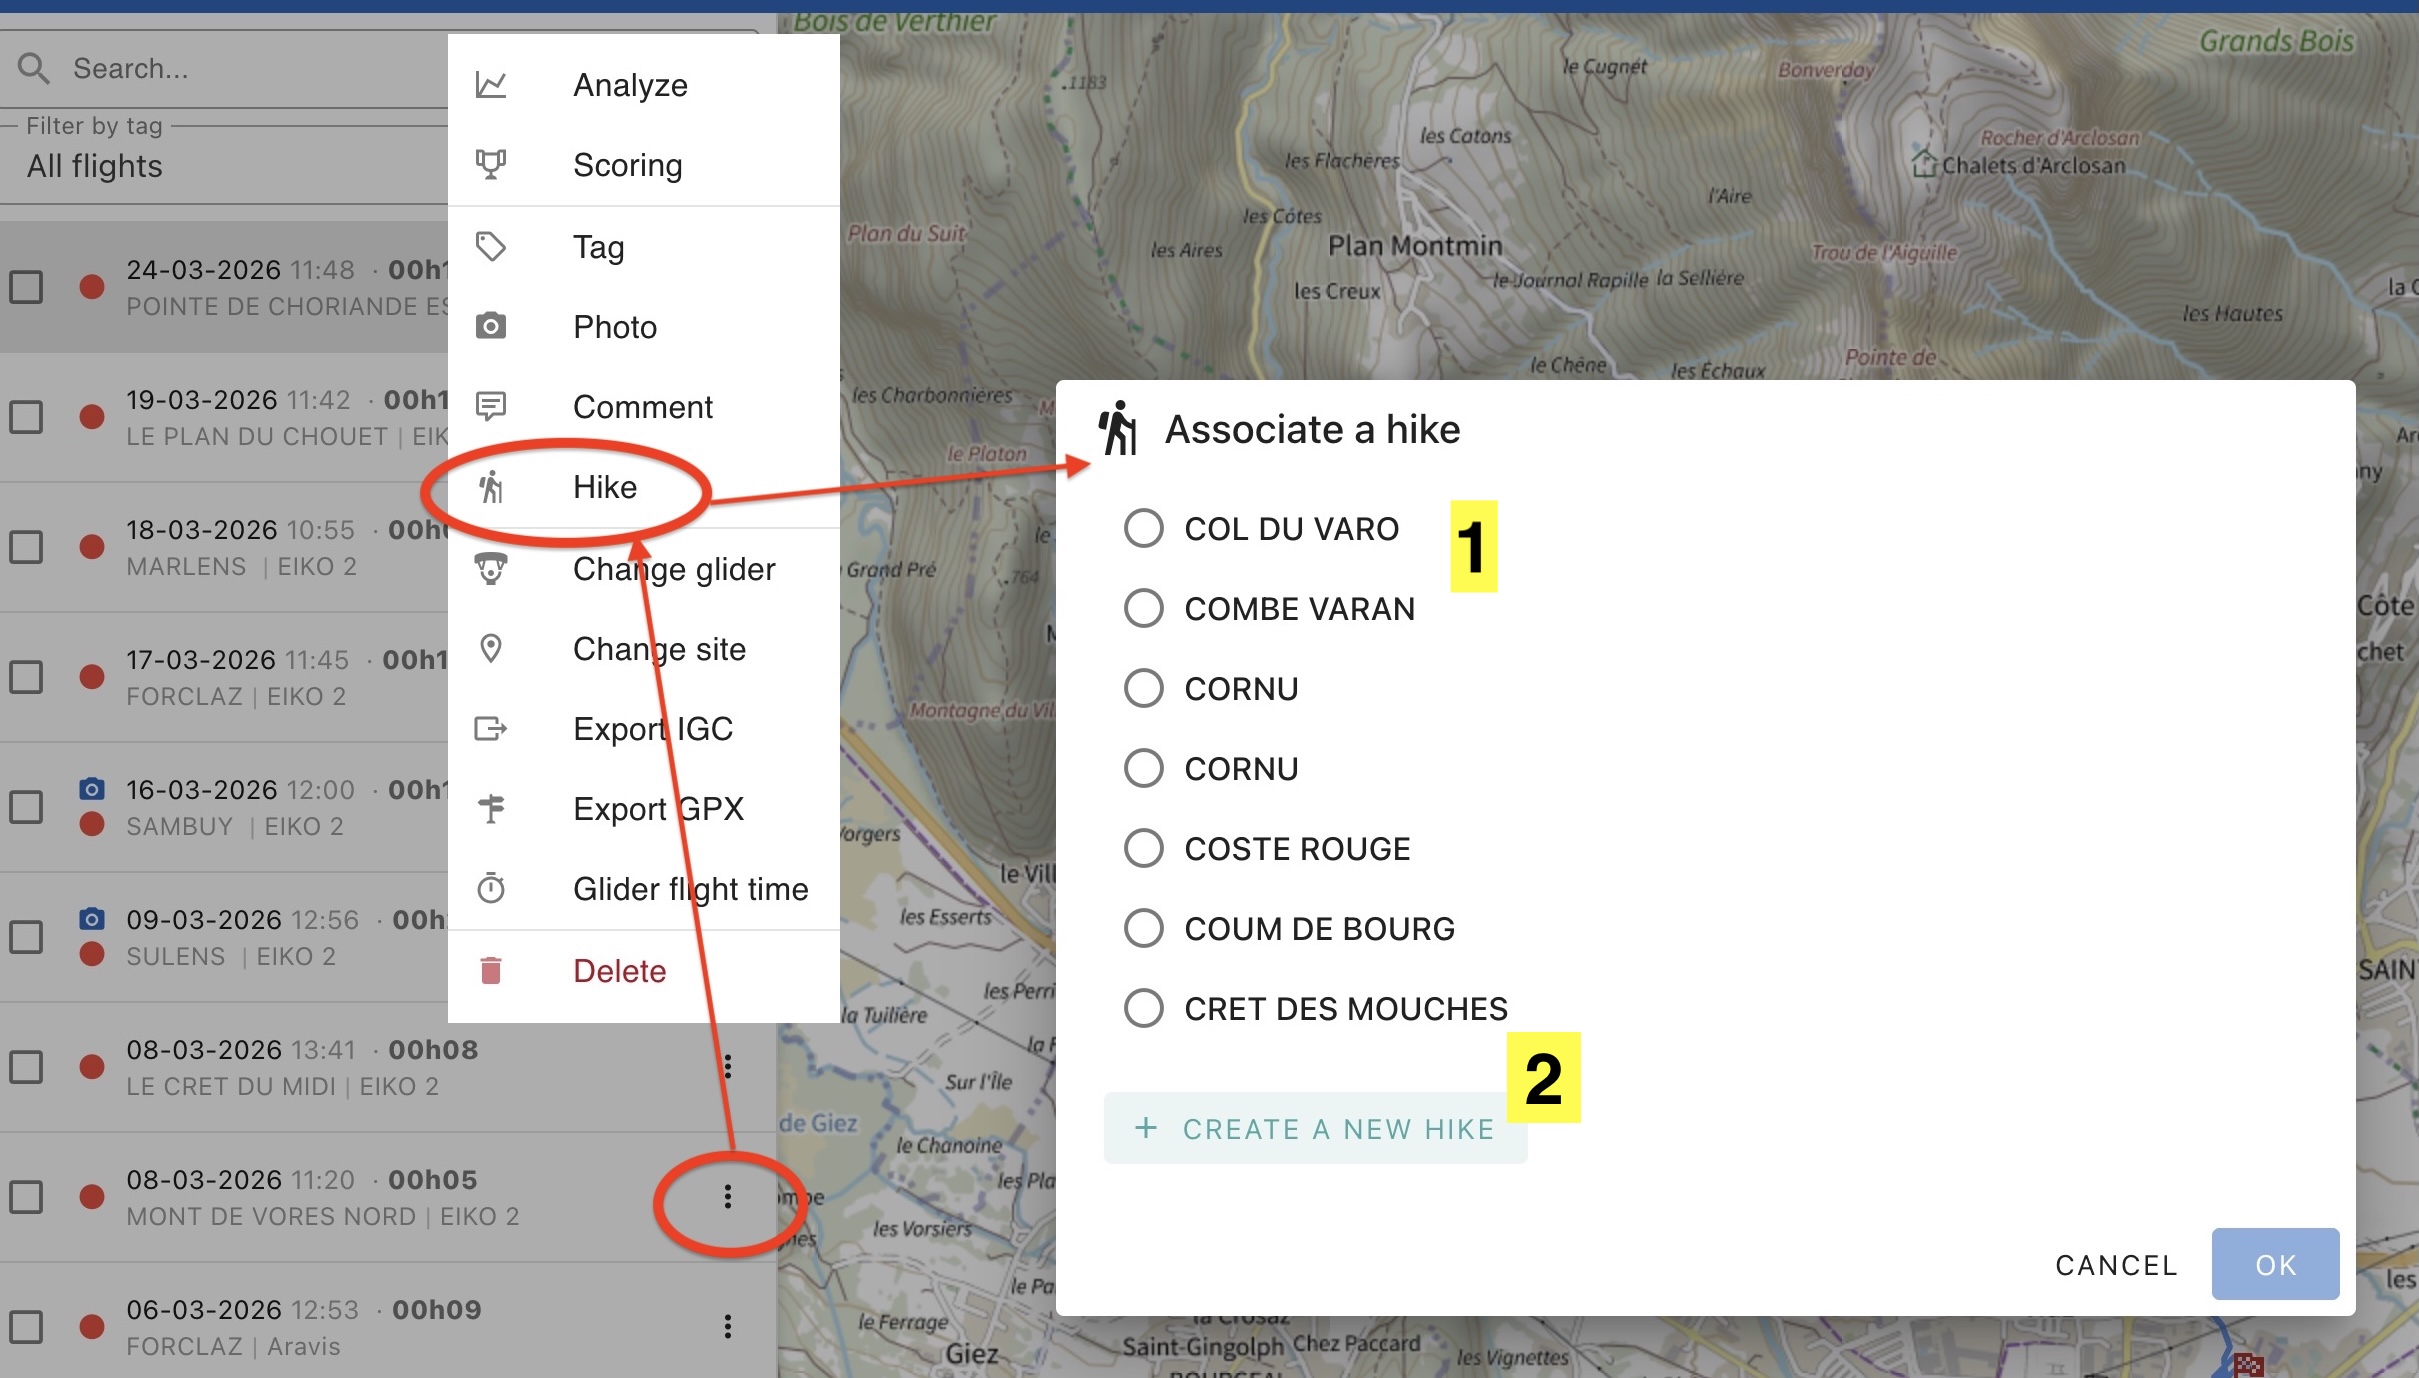
- The hike is in the list. Select it and enter the ascent time.
- The hike is not in the list. Click on Create a new hike (See below). After confirming, enter today’s ascent time.
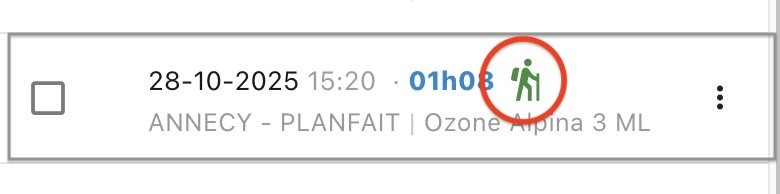
Once the entry is confirmed, a hike icon appears in the flight display in the list
Editing a hike
As with comments, click on the hike icon for the selected flight or select the Hike option from the context menu. You can then edit the ascent time for that day. To edit the associated route, you’ll need to delete the hike and re-enter the information.
Detailed Map
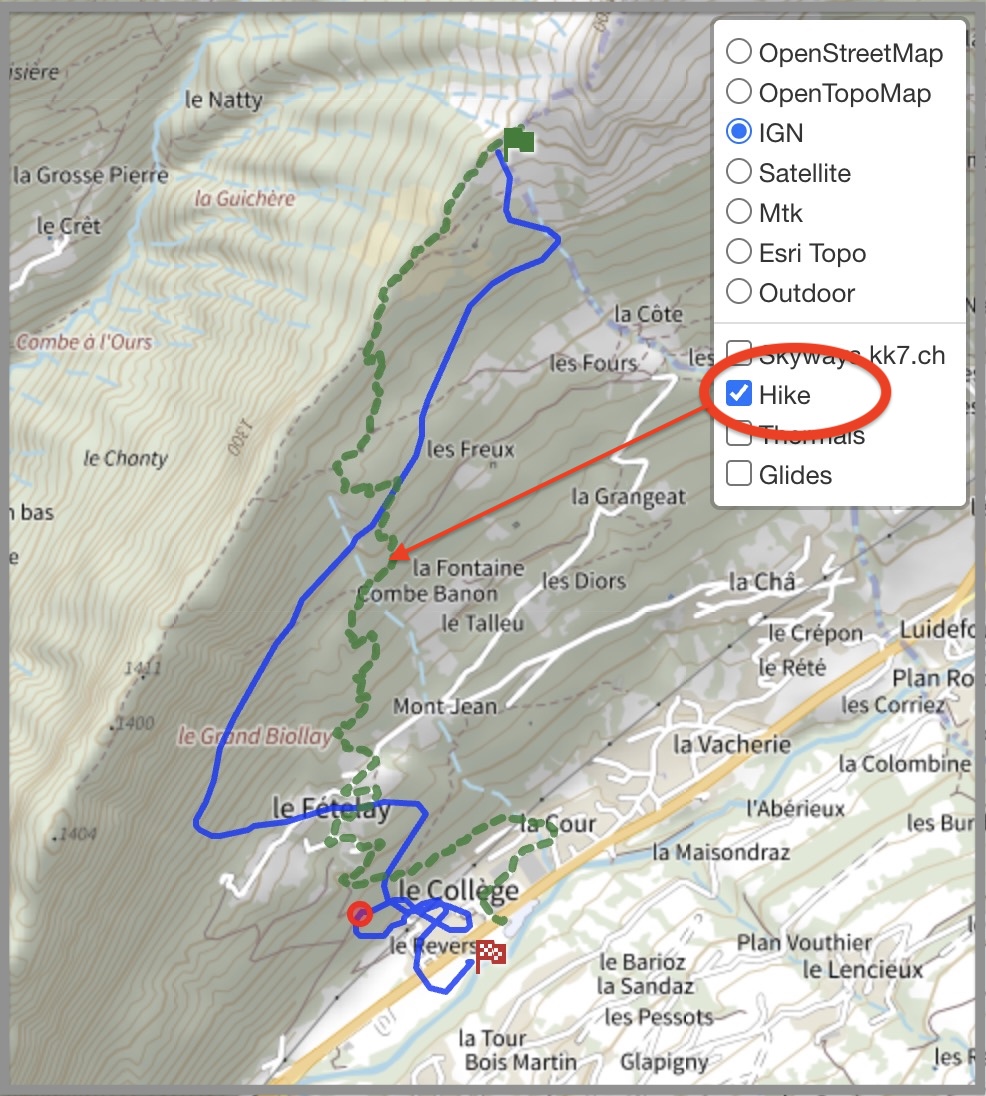
If a hike associated with a flight has a GPS track, it will be displayed on the map. You can turn it off using the layer selector.
Hiking Filters
The search window includes a checkbox labeled Hike that allows you to filter flights with associated hikes.
Hike file
It is dynamically updated from the logbook or directly through its management module, accessible via the Sites & Hikes menu option.
GPS track
If you have a GPS track, import it using the Import button. The elevation gain, duration, starting coordinates, and ending coordinates will be filled in automatically
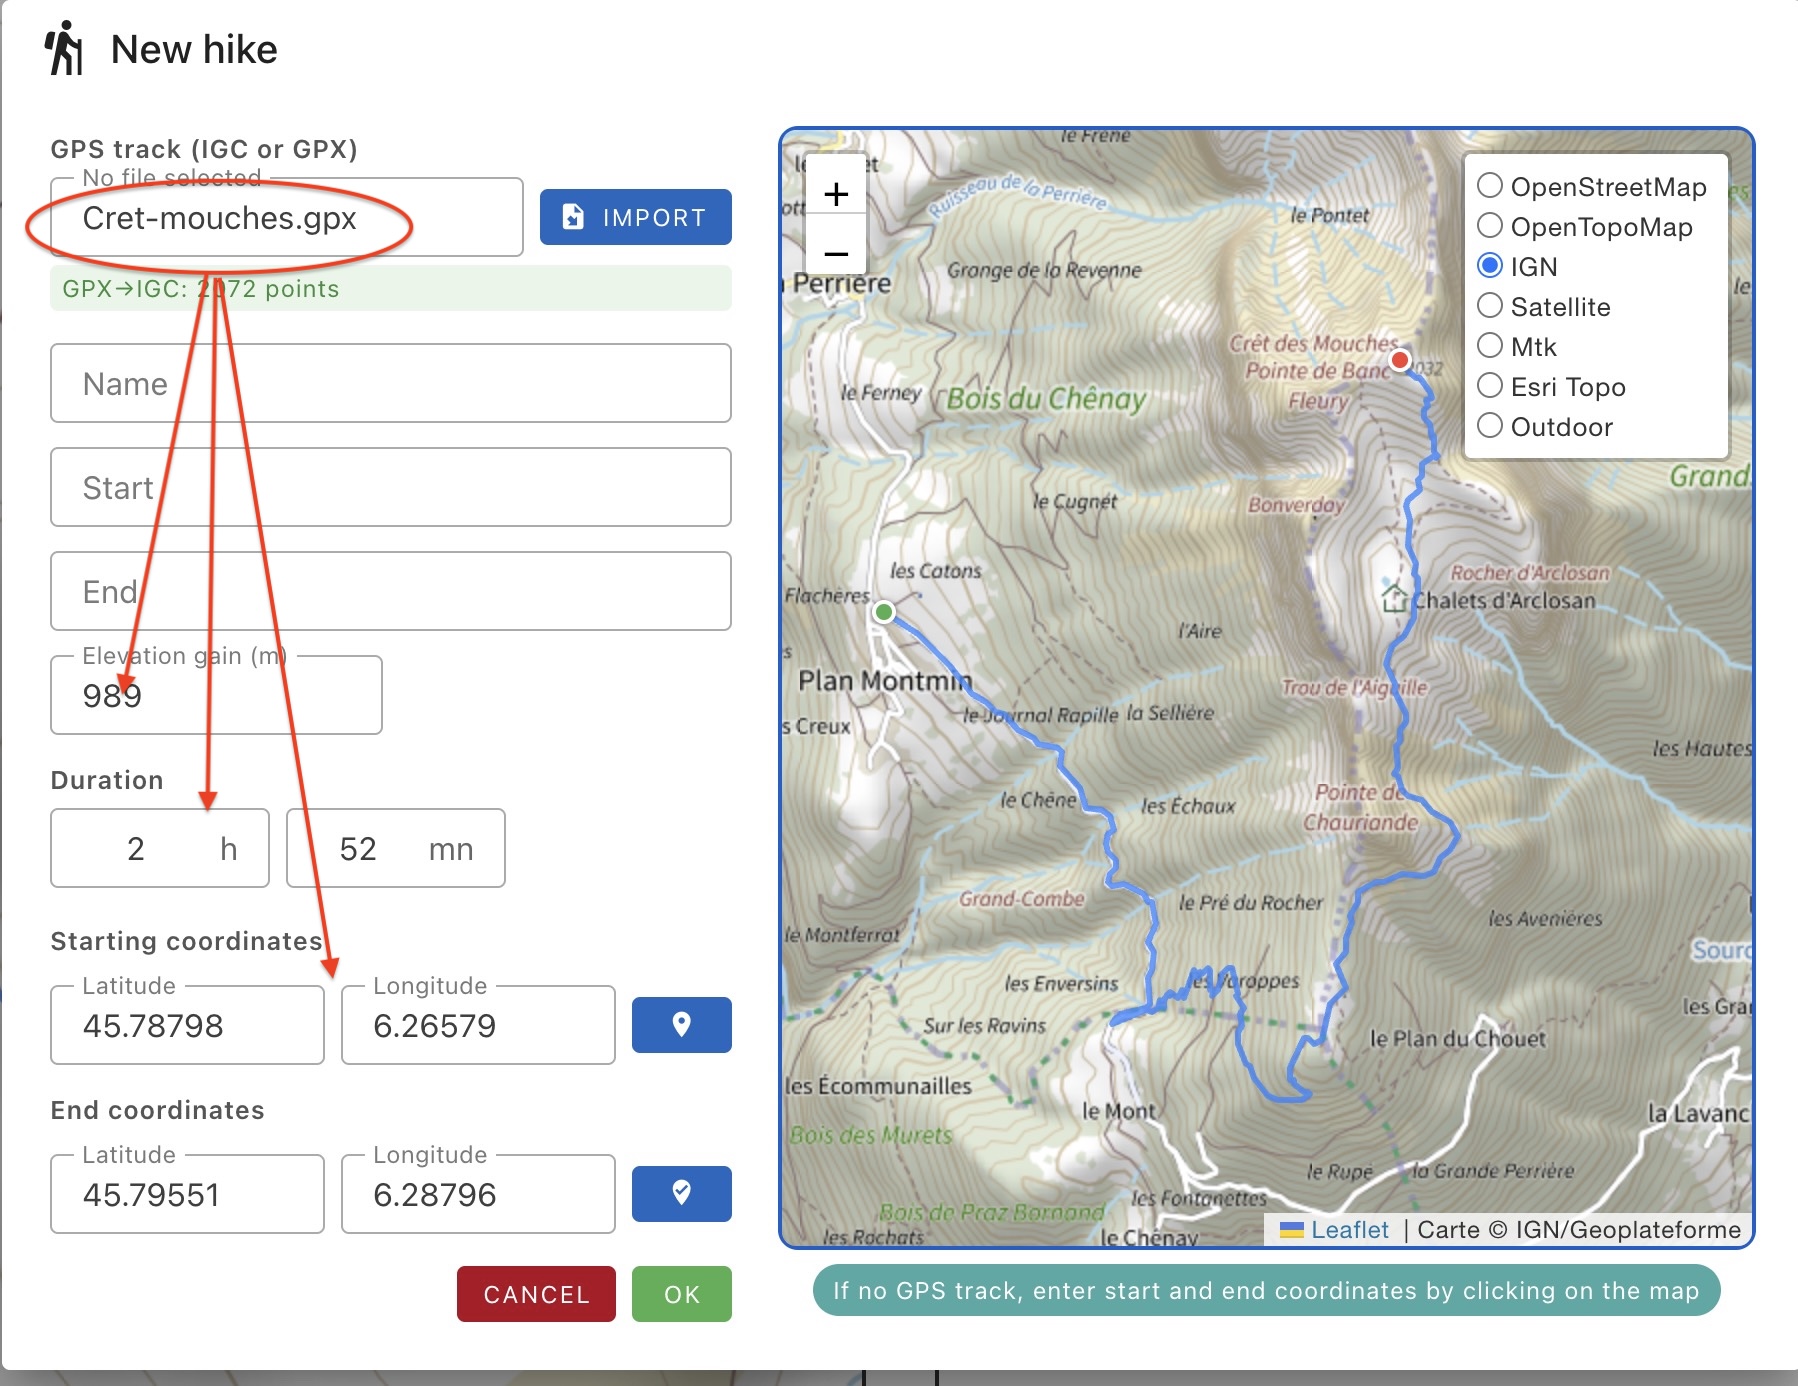
Fill in the following:
- Name of the hike
- Name of the starting point
- Name of the ending point
Click on OK to save.
No GPS track
Fill in all the fields:
- Hike name
- Starting point
- Ending point
- Elevation gain
- Estimated time
- Starting coordinates: use the map button to select the starting point by clicking on the map
- Ending coordinates: use the map button to select the ending point by clicking on the map
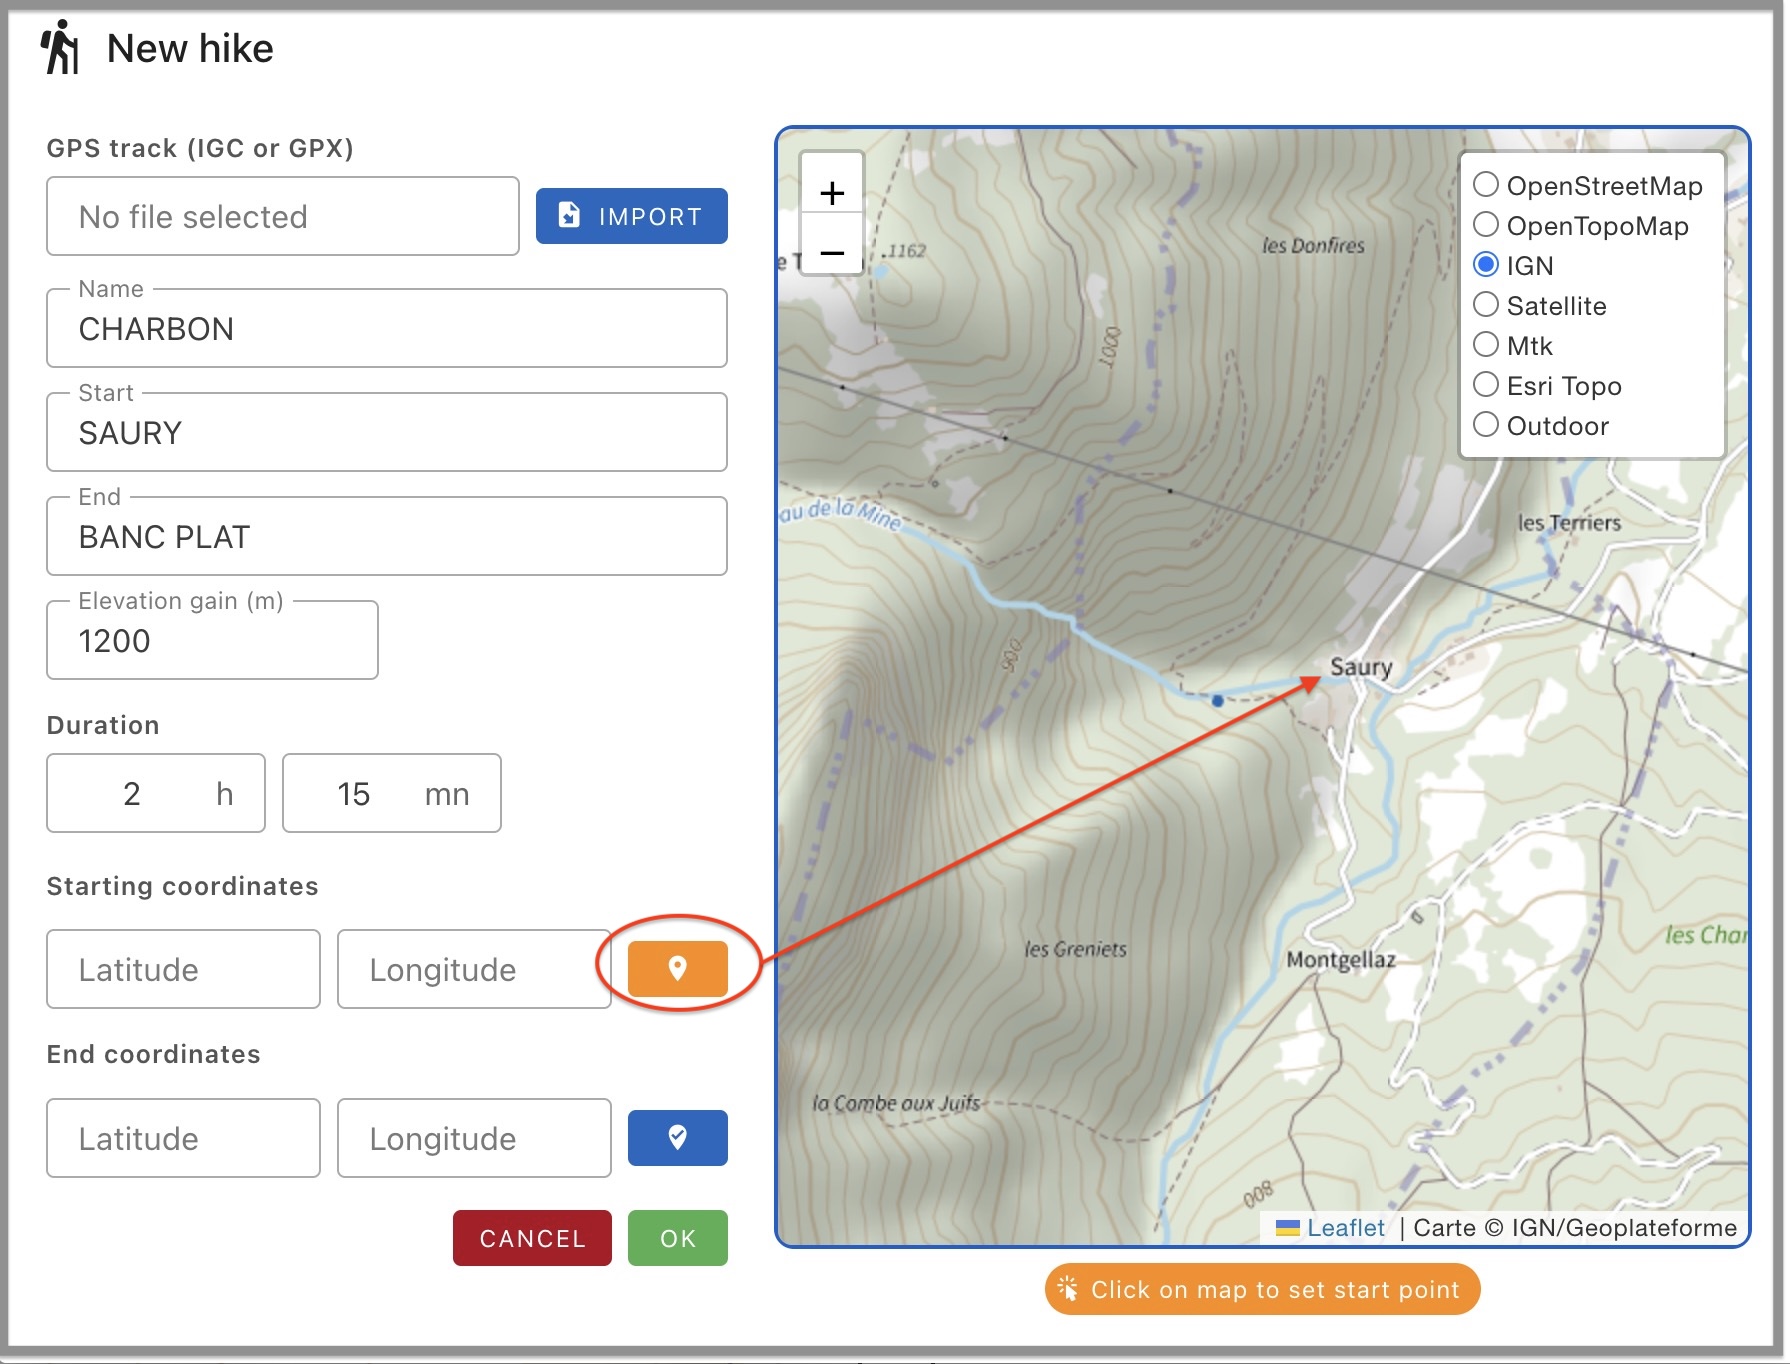
Finally the hike map will display a marker for the start and a marker for the finish.
Click on OK to save.