Skytraxx 3 4 5
The GPS Skytraxx must be connected to the computer. To recognize it by the computer:
- The Skytraxx must be turned on
- Press the ON button
- Switch to General Menu mode and validate the USB option
The Skytraxx should now appear as a simple USB key in the file explorer (Finder for Mac).
Warning
If you have just connected the Skytraxx, be patient, the detection by the operating system can take a long time, very long... The Skytraxx has adopted a complex folder structure that makes it difficult to explore folders. This phenomenon is particularly pronounced on Mac OS where it is exacerbated by a systematic file indexing. It is possible to disable indexing to speed up reading. Consult the page Mac Spotlight
In a browser-based usage, the user must designate the directory to be explored to indicate their agreement.
On clicking Import Import / Usb GPS / Skytraxx 3/4/5, a window appears giving instructions:
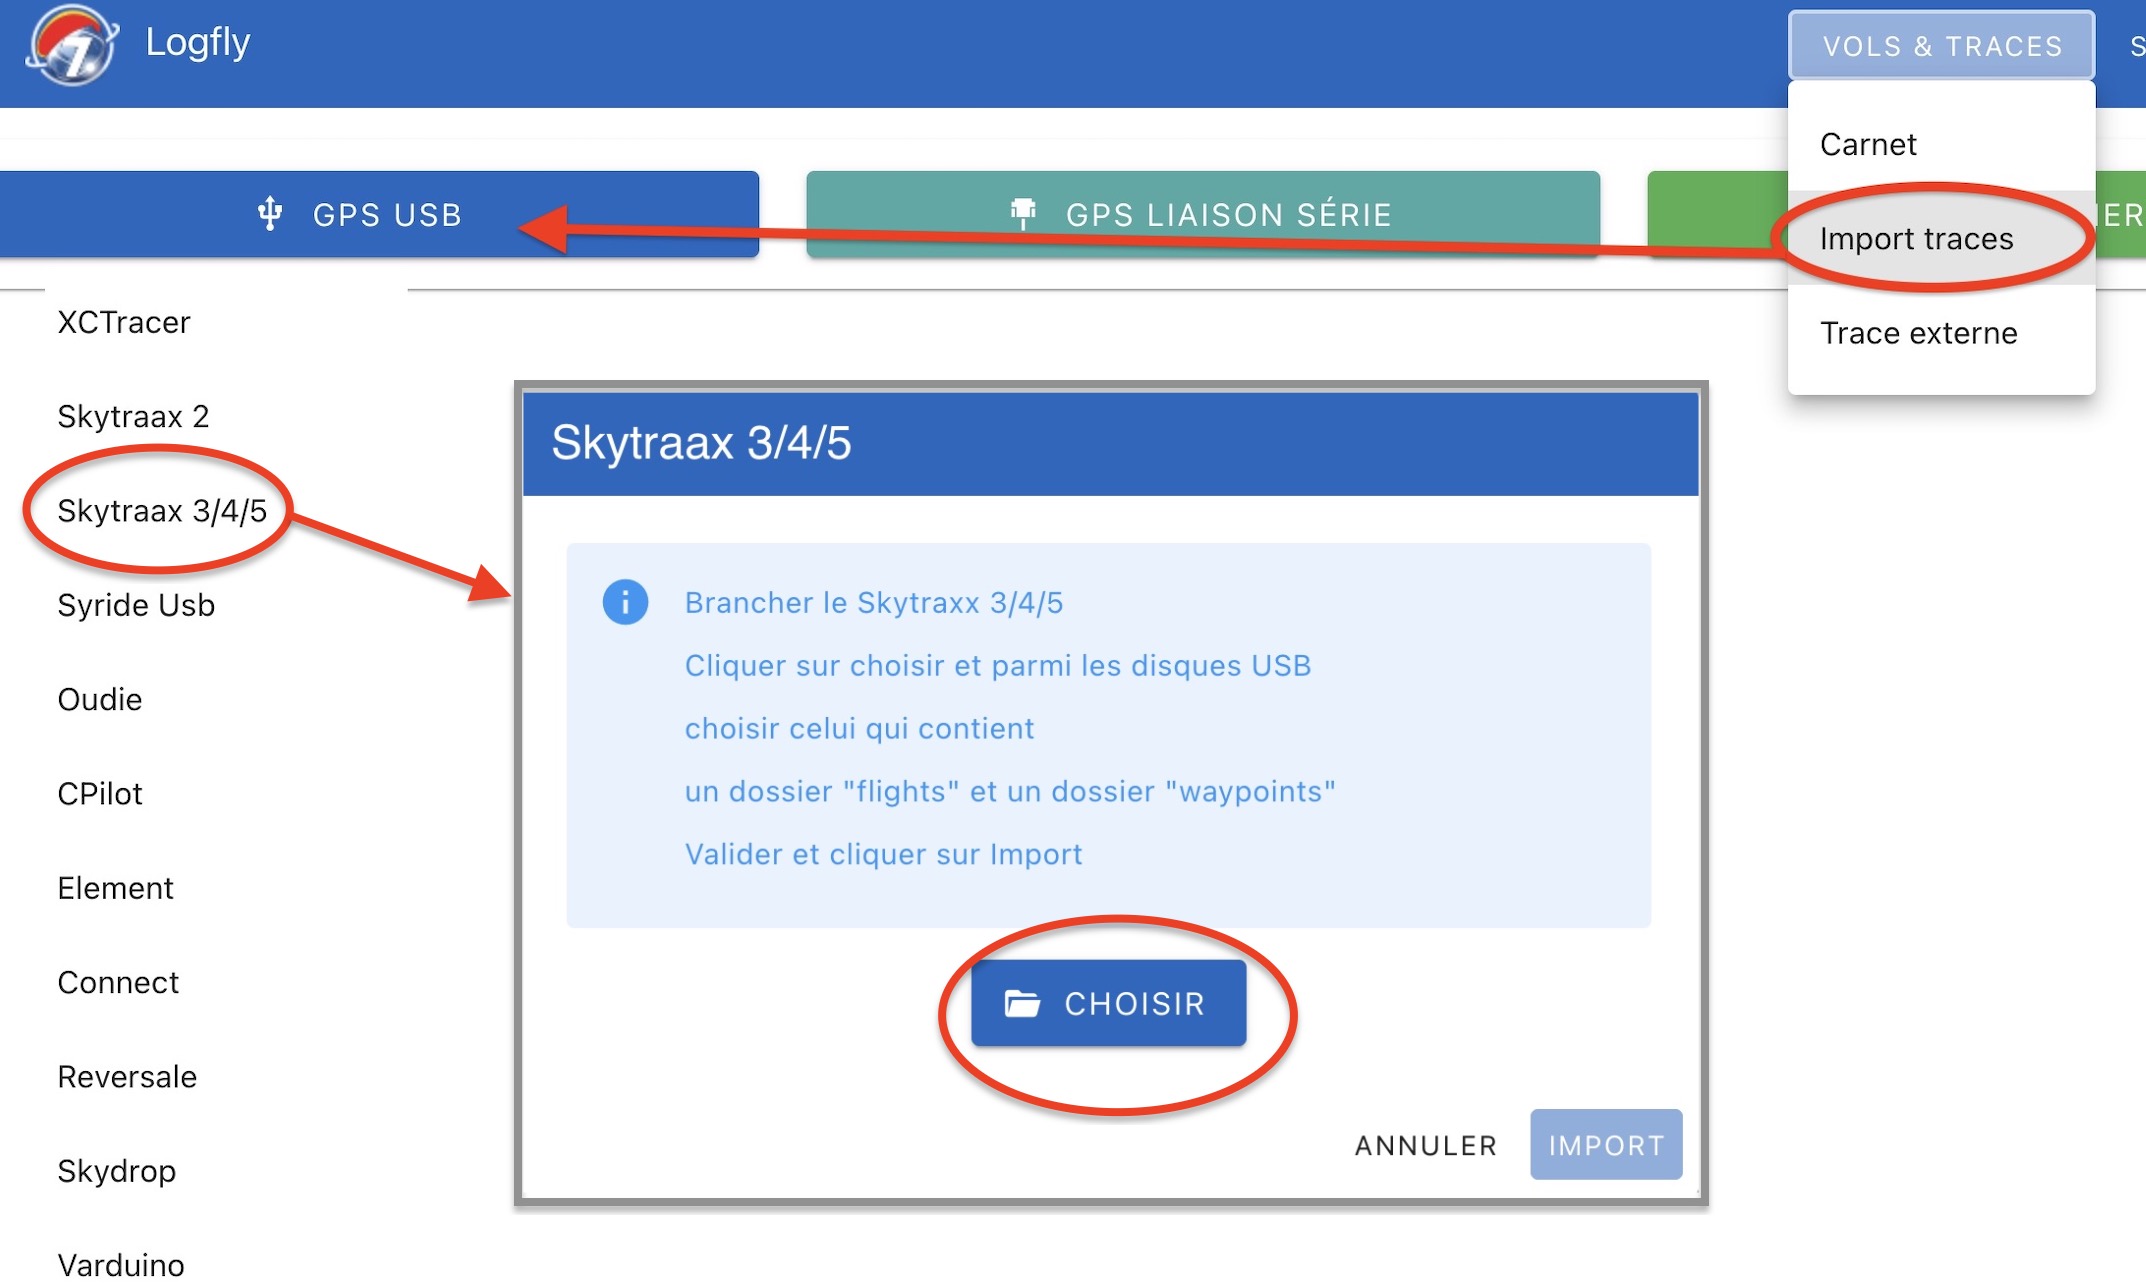
Click on the Choose button. Using the file selector, go to the Skytraxx disk. To recognize it:
- A flights directory
- A waypoints directory
- A flightscreens directory
- A pilot_profiles directory
Select the flights directory and allow Logfly to explore this directory:
The name of the selected directory appears in green. Click on Import to launch the exploration process. The process may take longer or shorter. Although viewed as a USB key, read operations are slower than on a real USB key. The flight table of the GPS is displayed as in previous versions.
Import into the logbook
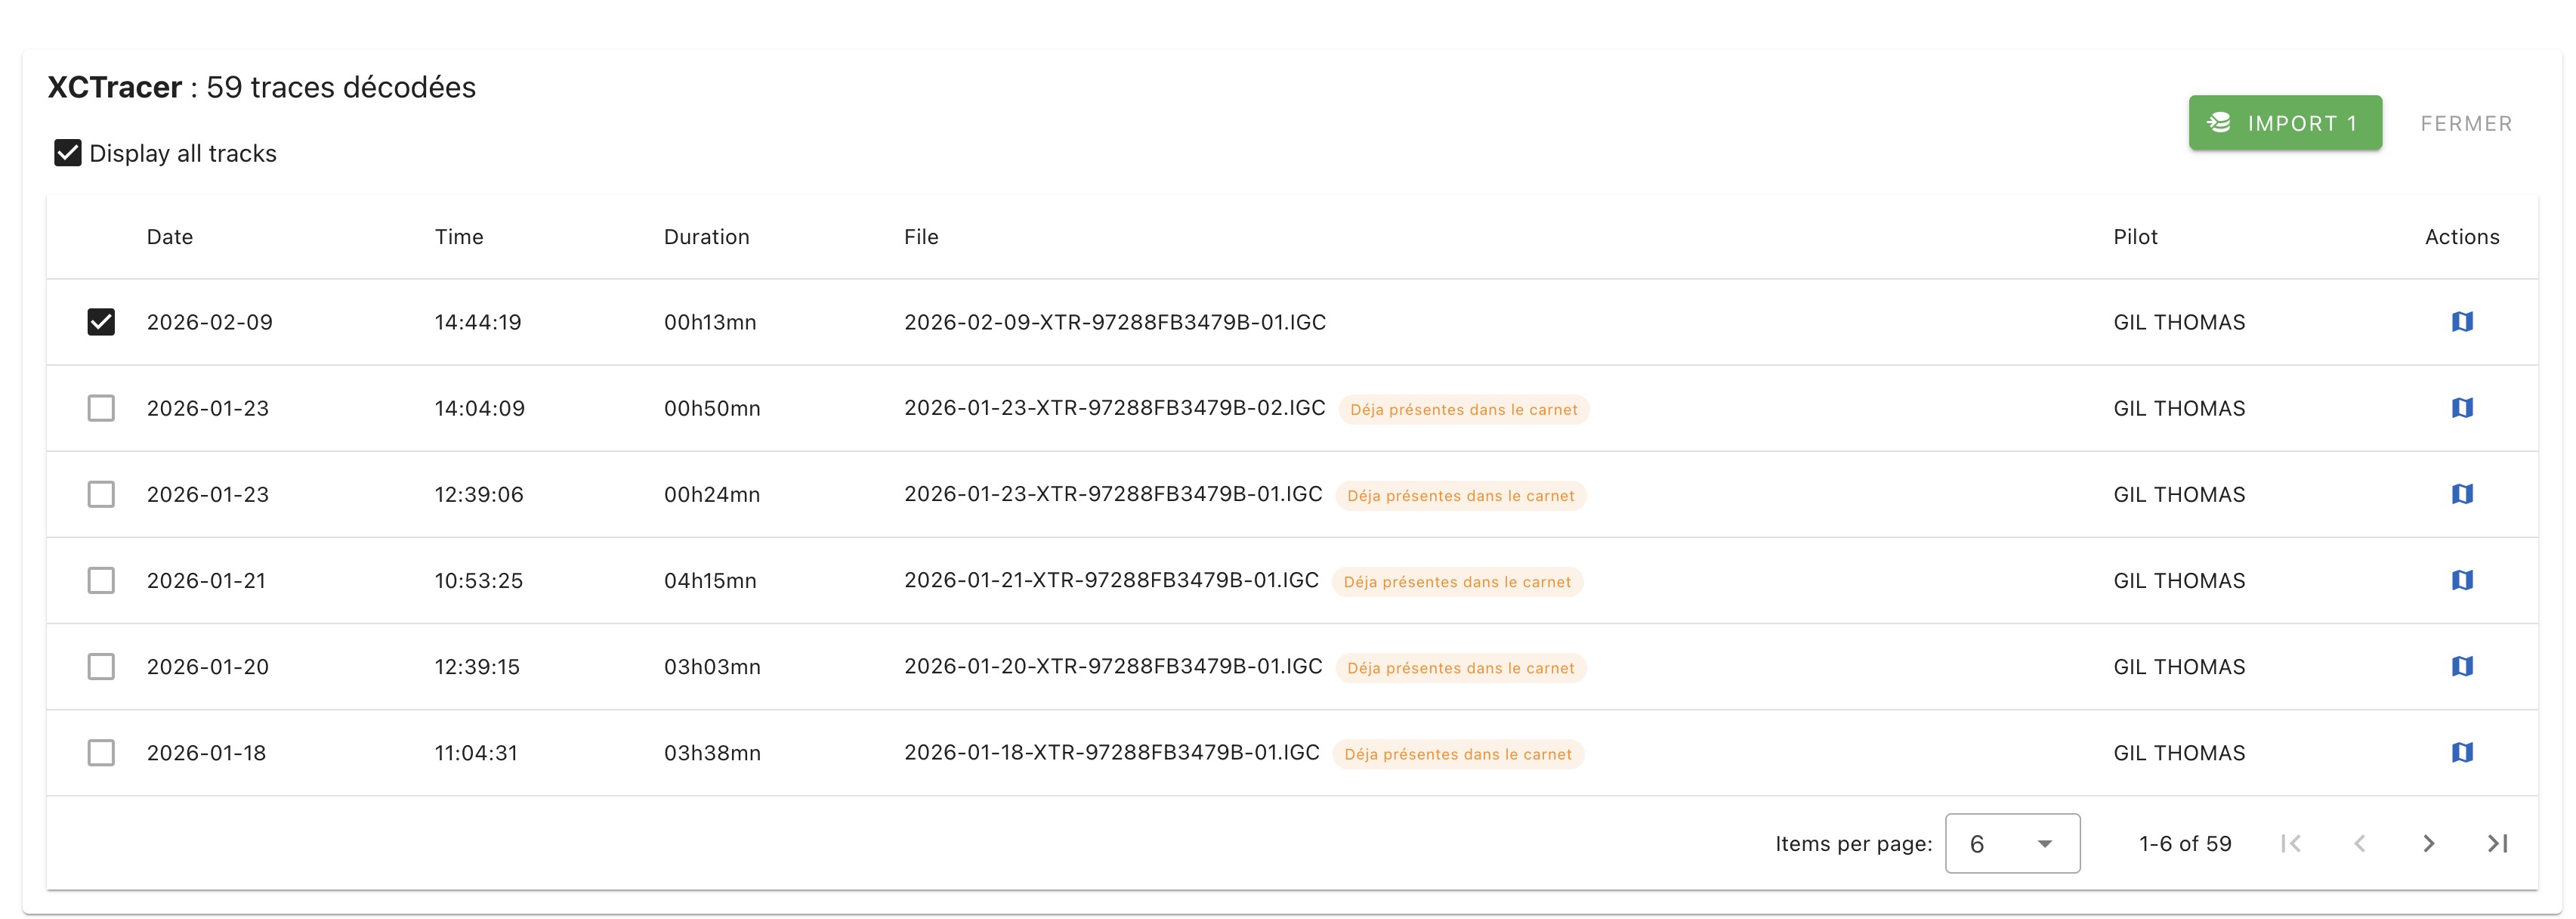
A list of flights present in the GPS is displayed. Only tracks not included in the logbook are checked. After verification, click on the green Import button that displays the number of selected tracks:
Warning
Don't forget to eject the Skytraxx disk before disconnecting it